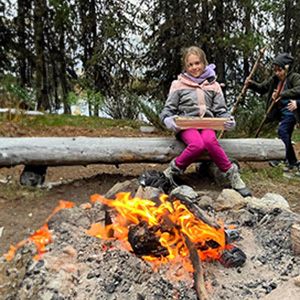
Single Flame Fire
Fire starters can be a huge help when you’re lighting a fire. They light quickly and hold a flame long enough to light other pieces of wood on fire. Don’t let rain or winter campfires stop you—fire starters are easy to make and can kick off your campfire with a single flame!
After making your fire starter, challenge yourself to light a fire with a single flame. You can easily spark your fire starter with a match or lighter to keep things simple. To step it up a notch, use flint and steel or other friction techniques too.
Back to Activity Generator
Materials Needed
Egg carton fire starter:
- Empty egg carton, cut up
- Wax (old candles or crayons work well)
- Old pot to melt wax
- Stove
- Other flammable materials to add to fire starter (lint, wood shavings, shredded paper, etc.)
Match and toilet paper fire starter:
- Strike anywhere matches
- Toilet paper
- Wax (old candles or crayons work well)
- Old pot to melt wax
- Stove
Toilet paper roll fire starter:
- Empty toilet paper roll
- Dryer lint
Safety Tips
- Fire Safety Tips
- To use your fire starter and light a campfire, make sure you are in a proper setting with adult supervision and have something close by to put out the fire if needed.
Instructions
Building Phase (20 minutes):
Egg carton fire starter
- Cut up an empty egg carton so that each egg holder is separated.
- Melt wax in an old pot – old candles or crayons (without their wrappers) work well for this.
Safety Note: Melted wax is hot – be careful when pouring it and ask an adult for help if needed! - While the wax is melting, fill your egg holders with more burnable materials, like dryer lint, wood shavings or even shredded paper.
- Pour the wax into each egg holder. Careful not to overfill it!
- Let the holders sit and allow the wax to cool and harden. They’re ready to be placed in your fire setup and lit!
Match and toilet paper fire starter
- Take a ‘strike anywhere match’ and 2-3 squares of toilet paper (do not rip them apart from each other).
- Fold the toilet paper in half widthwise and wrap it around the match. Keep the match head (the part you light) exposed.
- Melt wax in a pot.
Safety Note: Melted wax is hot – be careful when pouring it and ask an adult for help if needed! - Using tongs, hold the head of the match and dip the toilet paper-wrapped match into the wax.
- Let the wax cool and harden on the match.
- When you’re ready to use it, scrape the wax off the match head and strike it. Then, add it to your fire (be careful – it will catch quickly). This is an easy way to waterproof a match for your emergency kit!
Toilet paper roll fire starter
- Take an empty toilet paper roll and fill it with dryer lint.
- Fold over the edges of the toilet paper roll so that the lint does not fall out.
- To light your fire starter, place it in your fire pit and then light an edge of the toilet paper roll.
Scout Tip: Other quick fire starters that light up well are: Doritos chips, crayons, steel wool (touch a 9v battery to it or use another spark starter).
Assembly (15 minutes):
- In a fire ring, start by laying sticks out like a raft on the ground. This will keep your fire away from the cold, wet dirt.
- Crumple birch bark (gathered from the ground) or paper on the raft.
- Place your fire starter within the bark and/or paper, but make sure you can still reach it to light it.
- Put sticks that are no thicker than a pencil on and around the birch bark.
- Then put sticks that are about as thick as your fingers around the first sticks.
- Put sticks as thick as a broom handle around all the sticks in the pile, leaning them against each other for stability.
- Carefully light the fire starter—these catch sparks and get hot quickly.
- Grab some marshmallows and enjoy your campfire!
Scout Tips: Can’t find dry wood? No problem! Shave slivers off the exterior of wet wood to expose the dry wood underneath (this won’t work woods like birch that absorb moisture). You can also check out this video for building a campfire in wet conditions.
Review:
Congratulations, you’ve completed your single flame fire! After making your fire starters and testing them, take a beat to reflect on the activity—what worked, what didn’t, and were there areas for improvement?
Find activities like this and hundreds more on Scouts Canada’s Activity Finder!

